Dude, Where’s my (database) backups

I’m writing this post for myself 3 years ago. I had just graduated college and received my first job offer, Associate BI Developer. I knew nothing about SQL Server as a product, I had just used Management Studio a lot. In this series of posts, labelled by day number, I want to talk about the things that a new Database Administrator would find useful.

Let’s talk about the backups. All databases have a setting called recovery model. As of SQL Server 2016, there are only 3 choices for this setting. Full, simple, and bulk-logged. At the bottom of this post, I’ll provide some useful articles on database recovery models. For now, we need to know why this important.

When you pick your recovery model, you’re making a big decision for SQL Server. The choice of recovery model will decide how much data you can recover from your backup files.


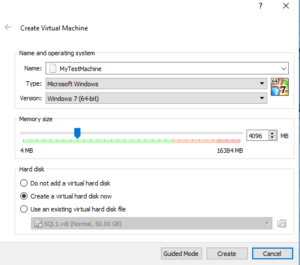
I’m going to demo the different backup tables in my test virtual box. You can create one just like mine (for free!) by following this post.

In this script, I create a backup of the master database, one of the five system databases on SQL Server. This database will exist on every installation of SQL Server.

Here is the script for creating a backup:

USE master
GO
BACKUP DATABASE master TO DISK = ‘C:\SQLData\master1.bkp’

The Service Account that your SQL Server uses must have permission to the location.

Now, I’ll show how to find this backup without knowing how the backup was taken. The system database, MSDB, has useful Dynamic Management Views, or DMVs, where you can find this information. The DMV I use to find SQL Server backups is msdb.dbo.backupmediafamily.

Query this DMV with a query like this:

SELECT * FROM msdb.dbo.backupmediafamily

In my environment, this returned two rows. The column I want to see is “physical_device_name” and it says:

C:\SQLData\master1.bkp

If there is a lot of activity on a SQL Server, this table will contain a lot of rows. This is a good place to start looking for backups, and the other tables related to backupmedia and backupsets within MSDB will fill in the other information on native SQL Backups.

So what if there is no information inside this table for your backups? This could mean many things. It could mean that backups are being taken by a third party program that doesn’t update SQL tables when it takes backups. It could also mean that the databases aren’t being backed up. It’s important to look for other reasons before assuming there are no backups, but this is a good place to start.


Setting up your own (free) local SQL Server for testing

This post is designed for anyone who wants instructions on creating a SQL Server instance on any computer you’d like. At the time of writing this post, none of these steps cost any money, just some of your time and disk space on your computer.

You’ll need:

  • A free Microsoft account
  • Access to the Internet
  • Disk space
  • Administration privileges on your computer

My setup is a home desktop PC with a 1 TB data drive. I’d recommend having at least 50 GB free, but you could follow this tutorial with only 20 GB free.

Here are the downloads you’ll need (links available as of 12/12/2016):

SQL Server 2016 Developer Edition

  • To access SQL Server 2016 Dev Edition, you will need to sign up for a free Visual Studio Dev Essentials membership. This is a perpetual free membership for the email account you used to sign up.

Windows Server 2016 from Microsoft Evaluation Center

  • Pick file type of ISO

Virtual Box or virtualization technology of your choice.

SQL Server Management Studio

Please start all the above downloads while you read the instructions below. To install Windows Server 2016 on Virtual Box, you will need to enter your computer’s BIOS and turn on 64 bit virtualization. This setting might be called something else on your PC.

To begin your installations, install Virtual Box and start a new Virtual Machine (VM) by pressing the blue circle labelled “New”. You must pick a VM type of Microsoft Windows and the version must state 64 bit. I usually pick about 4096 MB of Memory because my PC has 16 GB. Pick at least 512 MB memory for your VM or it may not have enough memory.

testmachine1

Hit the “Create” button. On the next screen, the prompt is asking to select the size of the hard drive. I picked my data drive, F, and allocated a fixed size of 50 GB. Then hit Create again.

testmachine2

Your next step is to install Windows Server 2016. Virtual box will prompt you to select your ISO file. Browse on your PC to where you downloaded Windows Server. Install Windows Server 2016 normally. The only important part is to make sure that you choose the version of Windows Server that has a GUI. In Windows 2016, the desktop experience is no longer a default option. If you don’t do this, when you boot your VM, you will not see the normal desktop.

From now, we will be using the VM with Windows Server installed. To make life easier, I recommend installing an ISO that came with your Virtual Box setup files. There’s an ISO called VBoxGuestAdditions that will allow you to map a shared network drive between your VM and your PC, once you install it. Install this and map a shared drive (Devices->Shared Folders->Shared Folder Settings), so that you can transfer files back and forth between VM and PC. You can map any ISO to your Virtual Box by selecting Devices->Optical Drives->Choose Disk Image… and then picking an ISO file on your PC.

With Windows Server installed, we still need to install SQL Server 2016 Developer Edition and SQL Server Management Studio (SSMS). The order that you install these applications doesn’t matter. To install SSMS, place the .exe that you downloaded from earlier into a shared drive that you’ve mapped. I won’t cover the process of installing SQL Server in this blog post, but the bare minimum option you need is the SQL Server Engine install. Once you have installed these two, you’ll have a functional SQL Server available in this VM.

To close your VM, you can either pick Save machine state or Power off the machine. I like to save the machine state since then I can resume where I was in my VM. Power down is just shutting down the machine.

By continuing to use the site, you agree to the use of cookies. more information

The cookie settings on this website are set to "allow cookies" to give you the best browsing experience possible. If you continue to use this website without changing your cookie settings or you click "Accept" below then you are consenting to this.

Close